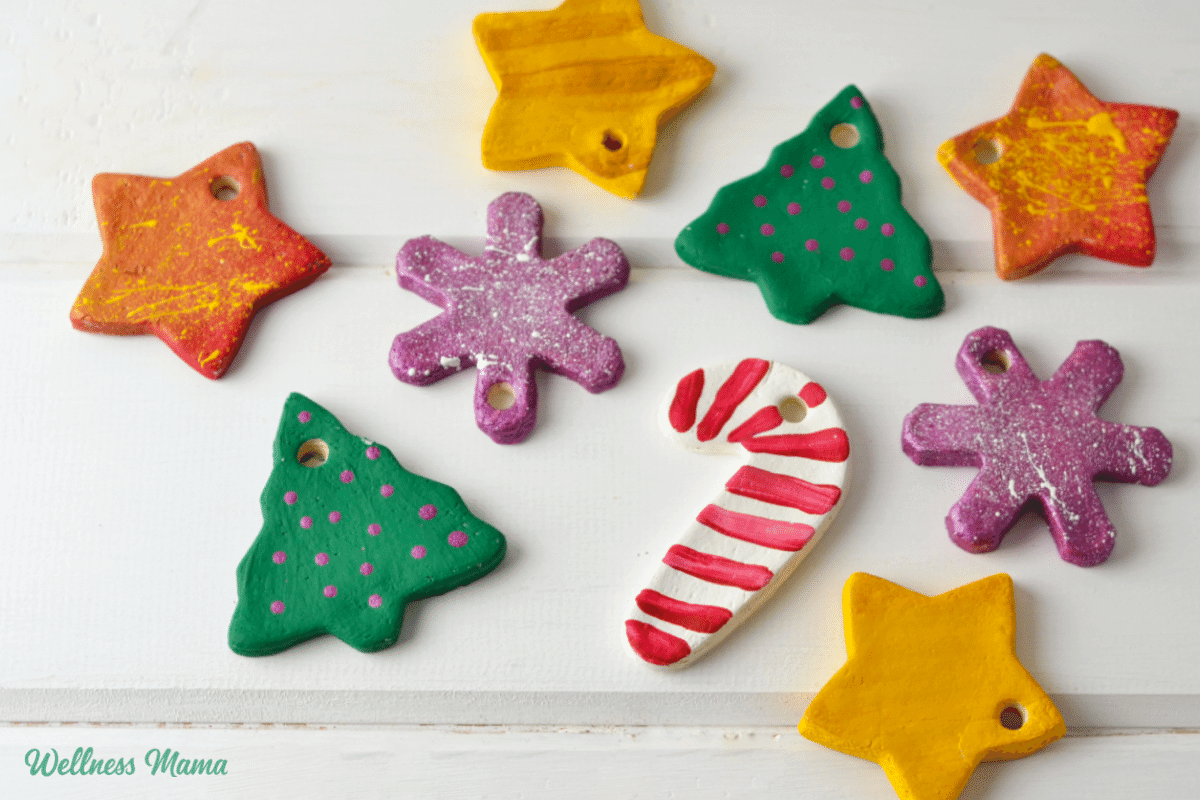
Christmas crafts are some of our favorite things to do this time of the year. And there have always been handmade ornaments on our Christmas tree. These easy salt dough ornaments make great keepsakes for the holiday season. They’re also a great gift for the grandparents!
Salt Dough Ornaments
A few years ago I started to focus more on natural looking Christmas decorations. That included things like burlap garland and handmade Christmas ornaments. My kids have always loved creating their own and hanging them on the tree. While my older kids are now teenagers (and not that into handprint ornaments!) I still like looking back at the ornaments they made when they were younger.
This step-by-step salt dough recipe is easy to make and fun for the kids! It’s made with just three simple ingredients: salt, water, and flour. While I don’t like to eat processed, white flour, it works great for ornament making.
Table salt is another ingredient you won’t normally find in my house. Mineral-rich sea salt or Himalayan salt is much healthier to eat but doesn’t work as well for DIY salt dough ornaments. Regular, cheap table salt from the cardboard canister at the store makes the best salt dough. And it’s much cheaper.
Salt Dough Handprint Ornaments
Salt dough is a great medium for capturing your little one’s handprint (or footprint). And if you have some fur babies in the house, it works well for pawprints too. Be sure to cut a circle big enough to fit their hand/foot/paw in. It will take longer to bake than the smaller cookie cutter variety.
Salt Dough Ornament Ideas
While they’re popular during the holiday season, salt dough ornaments can be made any time of the year. You can make handprints to commemorate the birth or baptism of a new baby. Or make egg-shaped ornaments to paint for Easter.
For these ornaments, the kids and I used Christmas cookie cutters. Snowflakes, gingerbread men, stars, etc. all work well.
Decorating and Sealing The Ornaments
Acrylic or craft paint works best to decorate the ornaments. Washable or tempura paint won’t last, and oil paint is unnecessary and very hard to clean up. Some recipes call for adding food coloring to the dough, but we prefer painting the ornaments.
It’s also important to seal the ornaments so they’ll last longer than one season. A lot of acrylic varnishes and polyurethane sprays are toxic, but I found this acrylic glitter varnish that works well. Mod podge will also work and it’s non-toxic.
Over time mod podge and certain sealants can start to turn yellow, giving the artwork beneath an odd tinge. Keep the ornaments away from direct sunlight and heat to help prevent yellowing over time.
Salt Dough Ornaments Recipe
Equipment
Materials
- ½ cup table salt (the cheap kind)
- 2 cups all purpose flour (do NOT use self rising flour)
- ¾ cup water (or more)
Instructions
- Preheat the oven to 200 degrees.
- In a large bowl combine the 1/2 cup salt and 2 cups flour.
- Add the water to the mixing bowl and mix until the dough comes together. You may need to add a little more water or flour, 1 tsp at a time to get the correct consistency. It should be dry enough that it doesn't stick to your fingers or the countertop, but not so dry it's crumbly and cracking.
- Turn the dough out onto a clean countertop, kneading for a few minutes.
- Use the rolling pin to flatten the dough to about 1/4 inch and then cut out shapes with the cookie cutters.
- Use the straw or skewer to poke a small hole in the top of each ornament.
- Transfer the shapes to a parchment lined cookie sheet and bake the salt dough for 90 minutes.
- Turn the ornaments over and bake for another 30-90 minutes. (or longer if needed). The ornaments should no longer be soft or squishy when done.
- Cool slightly, then remove the DIY ornaments from the baking sheet and onto a cooling rack.
- After the ornaments have completely cooled (several hours), they're ready to paint. Use acrylic paints to decorate them however you want.
- Use several coats of acrylic varnish or mod podge to seal the ornaments once they're dry. This helps to preserve them so they can last for years. Either a glossy or matte varnish will work.
Notes
- Most varnishes have harmful chemicals so opt for a non-toxic one.
- Store the ornaments in a dry place away from direct sunlight.
Have you ever made handmade ornaments before? How did it go? Leave a comment and let me know!


Leave a Reply